10🧾
Invoices — view, print, edit
Every sale is one line here — when, to whom, how much, how much is due and how much profit. You can reprint any old memo.
📍 Where to find it: Left menu: Sales → Invoices.
📷 Screenshots show the panel in Bangla — switch the panel to English and the same buttons appear in English.
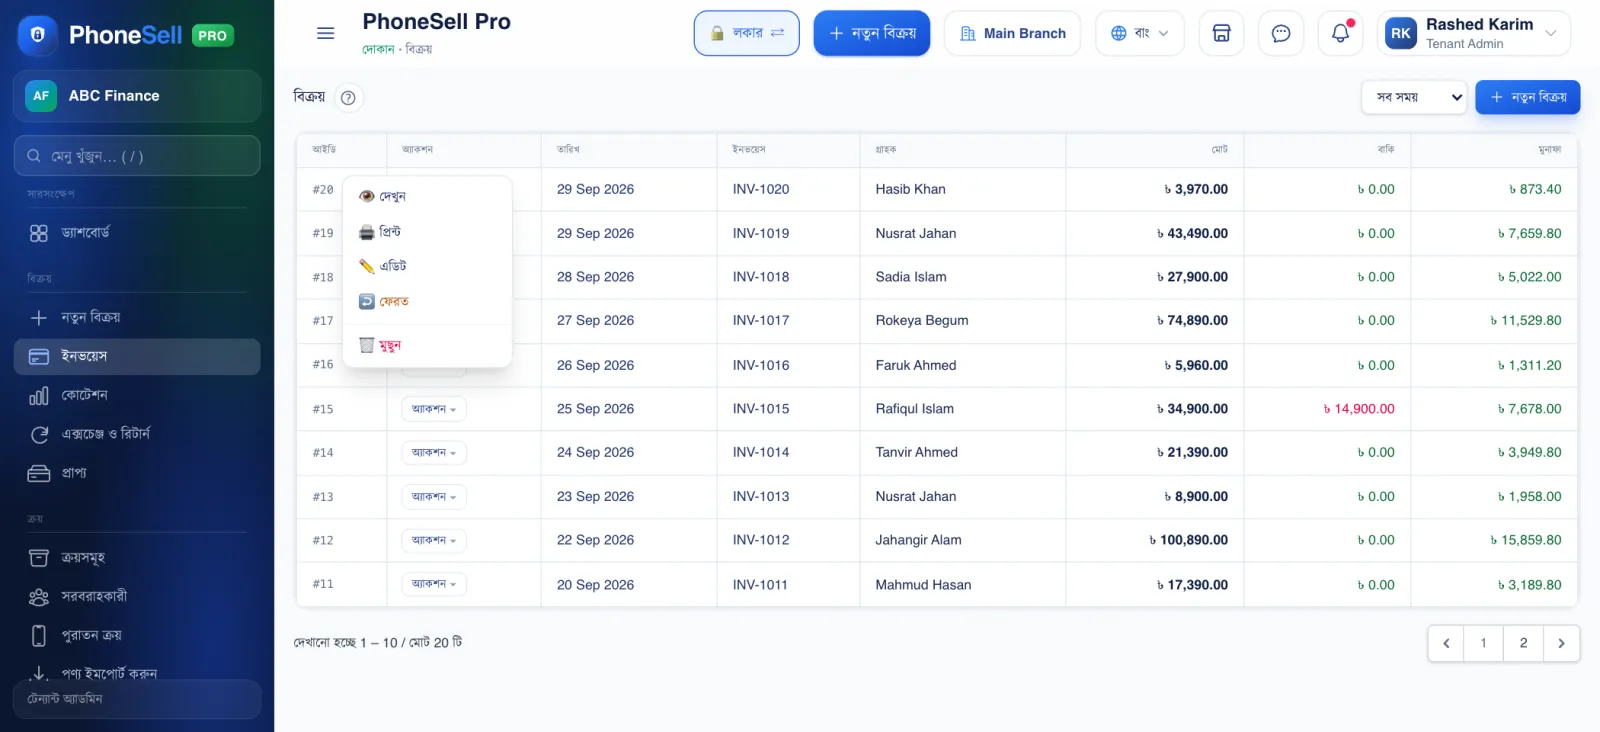 1234567
🔍 Tap the picture to enlarge
- 1Pick a period. Sales for today, yesterday, this week, this month or a specific date.
- 2View. The full details of the memo.
- 3Print. Print the memo in the size you want (picture below).
- 4Edit. Fix a wrong price, product or payment — stock and accounts are corrected automatically.
- 5Return. When a customer returns goods — see the “Returns and exchanges” chapter.
- 6Delete. Cancels the whole sale — the goods go back into stock and the money side is reversed.
- 7Profit. How much profit each sale made.
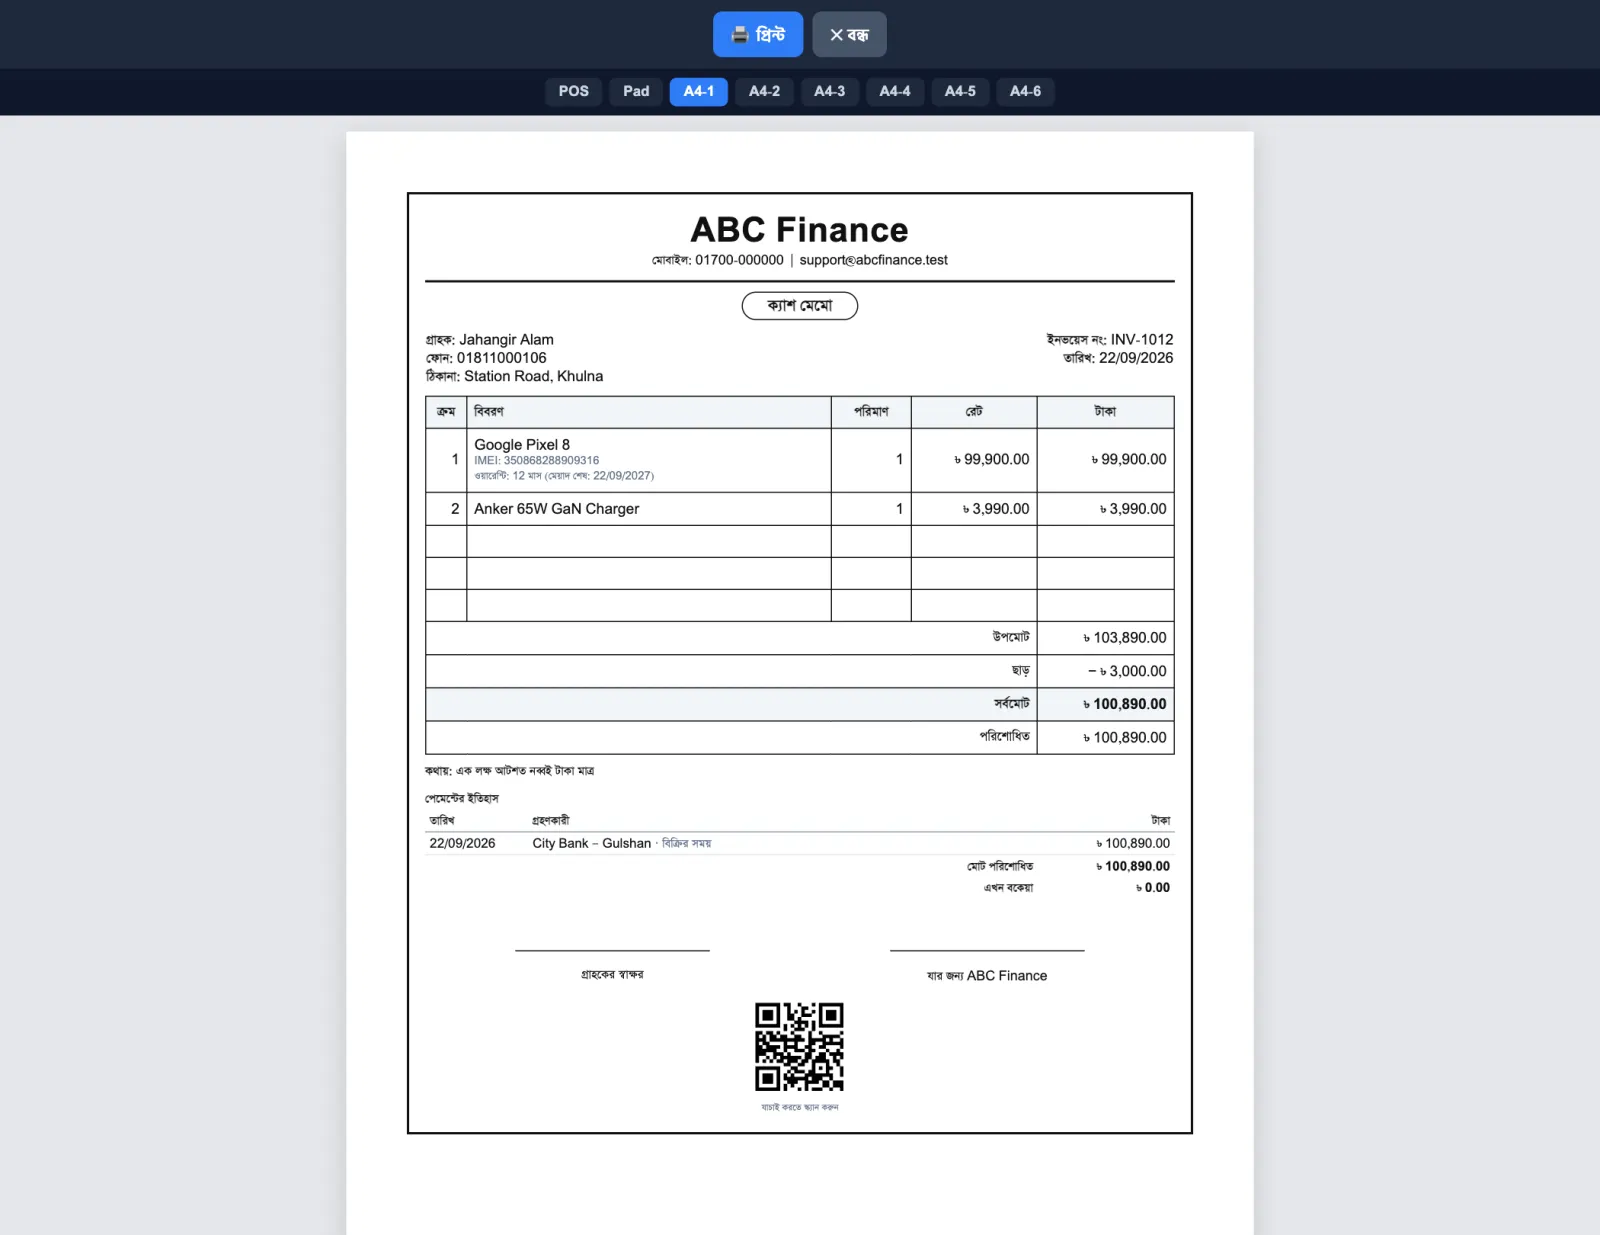 123456
🔍 Tap the picture to enlarge
- 1POS / Pad. A receipt for a small thermal printer, or printed on the shop's own printed pad.
- 2A4-1 to A4-6. Six different designs for full-size paper — pick the one you like. Which one opens first can be set in Stock Settings.
- 3Print. Send it to the printer, or use “Save as PDF” to send it to the customer.
- 4IMEI and warranty. The phone's IMEI and when its warranty ends are printed right on the memo.
- 5Payment history. When how much came into which account, and how much is still due.
- 6QR code. When the customer scans it with a phone, they can see the memo online — this makes fake memos easy to spot.
💡 Good to know
- If you add a shop logo, it appears on every memo; when there is a logo, the shop name isn't printed separately. Add the logo from Settings → Company & Branding.